What buy-side and sell-side liquidity actually are
In Smart Money Concepts, liquidity is not an abstraction — it is the resting pool of stop orders and pending orders that institutions need to fill large positions. Every market move is, in part, a hunt for that fuel.
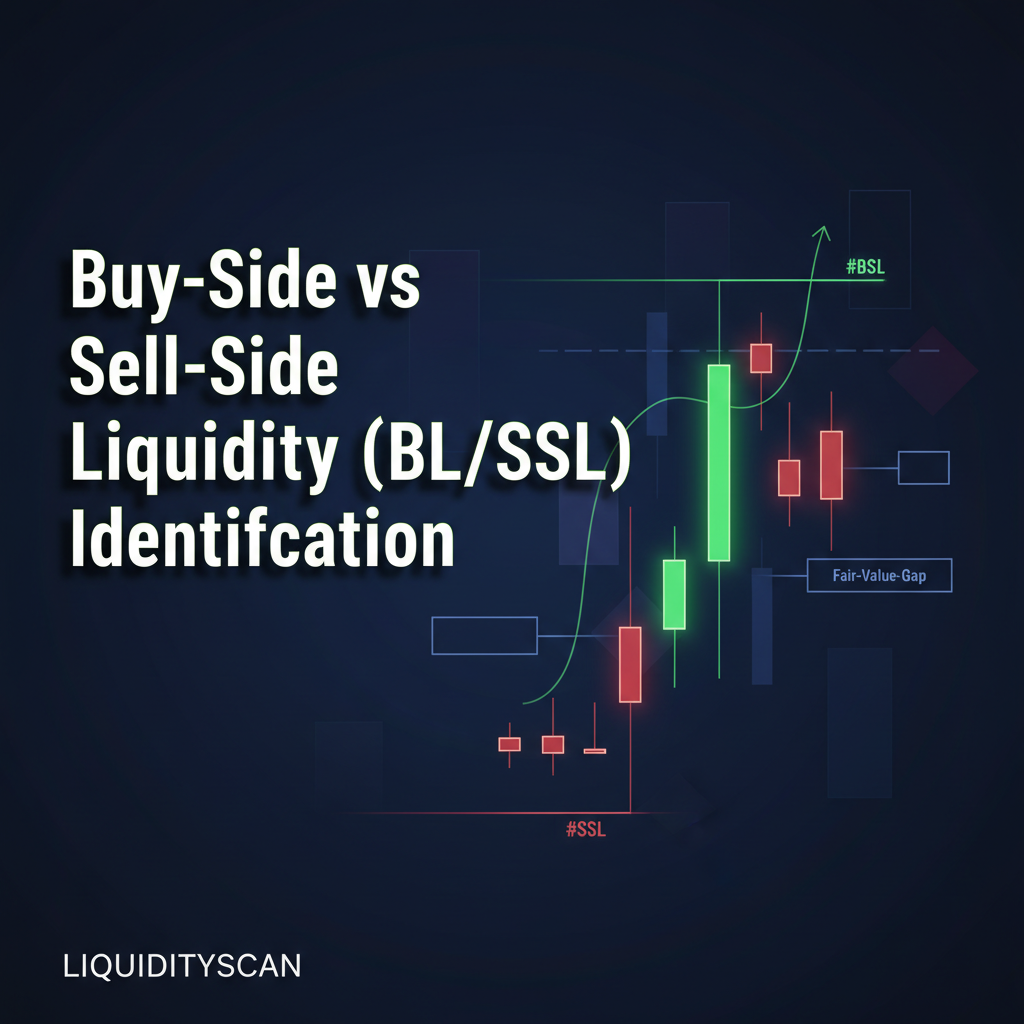
Buy-side liquidity (BSL) sits above price. It is the cluster of buy-stop orders parked above old highs: stop-losses from short sellers and breakout buy orders. When price trades into that zone, those buy orders execute, giving large players the counterparty volume they need to sell into.
Sell-side liquidity (SSL) sits below price. It is the pool of sell-stop orders resting under old lows: stop-losses from long traders and breakout sell orders. Price reaching down into SSL triggers those sells, letting institutions absorb size and buy.
The mental model that matters: retail places stops at obvious levels, and the algorithm is engineered to deliver price to those levels before reversing. Marking BSL and SSL correctly tells you where the market is likely being drawn, not just where it has been.
The chart formations that create liquidity pools
Not every high or low is a meaningful liquidity target. You are looking for levels that a crowd of traders would defend with stops. Three formations do this reliably.
Equal highs and equal lows
Two or more swing points resting at nearly the same price are the highest-quality liquidity signature. Equal highs (often written EQH) advertise a shelf of buy-stops above them; equal lows (EQL) advertise sell-stops below. The more times price taps the same level without breaking, the denser the stop pool becomes.
On NAS100 H1, a double top within a few points is a textbook BSL magnet. On EUR/USD M15, equal lows separated by a single pip cluster are prime SSL.
Major swing highs and swing lows
A clean swing high — a candle high with lower highs on both sides — holds the stops of everyone who shorted the prior leg or went long expecting continuation. The corresponding swing low holds the mirror image. These are your structural liquidity anchors when no equal highs/lows exist.
Trendline liquidity
When price respects a diagonal trendline for several touches, traders pile stops just beyond it. Institutions love trendline liquidity because retail treats the line as support or resistance, parking a diagonal wall of orders the algorithm can sweep in one move.
A systematic process for marking BSL and SSL
Consistency beats intuition. Run the same routine on every chart so your liquidity map is repeatable.
- Set your timeframe pair. Use H1 to define the draw and M15 to refine entries. Mark liquidity on the higher timeframe first.
- Mark the obvious external pools. Find the session high and session low, plus the prior day's high and low. These are your primary BSL (highs) and SSL (lows).
- Hunt for equal highs/lows. Scan left across the visible range and box any pair of highs or lows resting within a few points/pips. Label them EQH (BSL) or EQL (SSL).
- Add unswept swing points. Mark major swing highs/lows that price has not yet returned to take. An untouched swing is live liquidity.
- Draw trendline liquidity. If three or more touches form a clean diagonal, extend it — the stops sit just beyond.
- Rank the targets. Annotate each pool as high or low probability (criteria below). Your liquidity map is now a draw map.
Differentiating high-probability targets from noise
The skill that separates intermediate traders from beginners is filtering. A structural point is only a target if institutions have a reason to reach for it.
- Confluence with a draw. A pool aligned with the higher-timeframe direction (e.g., BSL above in an uptrend) is far more likely to be taken than one against the trend.
- Cleanliness of the level. Sharp equal highs with little price overlap are stronger than messy, overlapping wicks.
- Untapped vs. revisited. Liquidity that has never been swept carries full weight. A level price already pierced is spent fuel.
- Premium/discount location. BSL sitting in a premium array, or SSL in a discount, fits the institutional model of selling high and buying low.
- Time of day. Pools likely to be hit inside the London or New York kill zones outrank dead-session levels.
Demote anything that is mid-range, already swept, or against the dominant draw. A NAS100 swing high formed in the Asian session, well inside the prior range, is structure — not a high-probability BSL target.
From liquidity map to anticipating the sweep
A finished BSL/SSL map sets up the next read: the liquidity sweep. Price runs into a pool, triggers the resting stops, and frequently reverses as institutions take the opposite side. That reversal often prints a market structure shift or a change in the state of delivery on the lower timeframe.
Practically, you wait at a high-probability pool, watch for the sweep (a sharp wick through the level with rejection), and then look for confirmation — a displacement candle, a fair value gap, or an order block — before committing. The map tells you where; the sweep and confirmation tell you when.
Frequently asked questions
What is the difference between BSL and SSL in SMC?
Buy-side liquidity (BSL) is the pool of buy-stop orders resting above old highs, and sell-side liquidity (SSL) is the pool of sell-stop orders resting below old lows. Price is drawn up toward BSL and down toward SSL because institutions need those orders to fill size.
How do I mark BSL and SSL on a chart?
Mark the highs of equal highs, major swing highs, and the upper side of trendlines as BSL, and the matching lows as SSL. Start on the higher timeframe (H1), label session and prior-day extremes first, then add equal highs/lows and unswept swings.
Are equal highs always buy-side liquidity?
Yes — equal highs always represent buy-side liquidity because the matching stop-losses and breakout orders sit above them. Whether they are a high-probability target depends on confluence with the higher-timeframe draw, cleanliness, and whether the level is still untapped.
Which timeframe is best for identifying liquidity?
Use a higher timeframe such as H1 to define the major liquidity pools and the draw, then drop to M15 to refine the sweep and entry. This keeps your bias anchored to meaningful structure while timing entries precisely.
Is trendline liquidity reliable on indices like NAS100?
Trendline liquidity is reliable when the line has three or more clean touches and aligns with the higher-timeframe draw. On NAS100 it works well during the New York session, where displacement through a respected trendline frequently sweeps stops before the real move.
Related query paths
- Internal vs External Liquidity: An SMC Trader's Guide
- BOS vs. CHoCH: The Definitive Guide for SMC Traders
- What is LiquidityScan?
- What Are Smart Money Concepts? A Trader's Guide to Order Flow
- London vs NY Liquidity Sweeps: Which Session Drives the Real Move?
Map liquidity without staring at charts
LiquidityScan automatically detects equal highs/lows, swing liquidity, and sweeps across crypto and indices — then flags the institutional bias and draw for you, so your BSL/SSL map is built and ranked in real time. Try LiquidityScan's automated scanner and bias tools.