
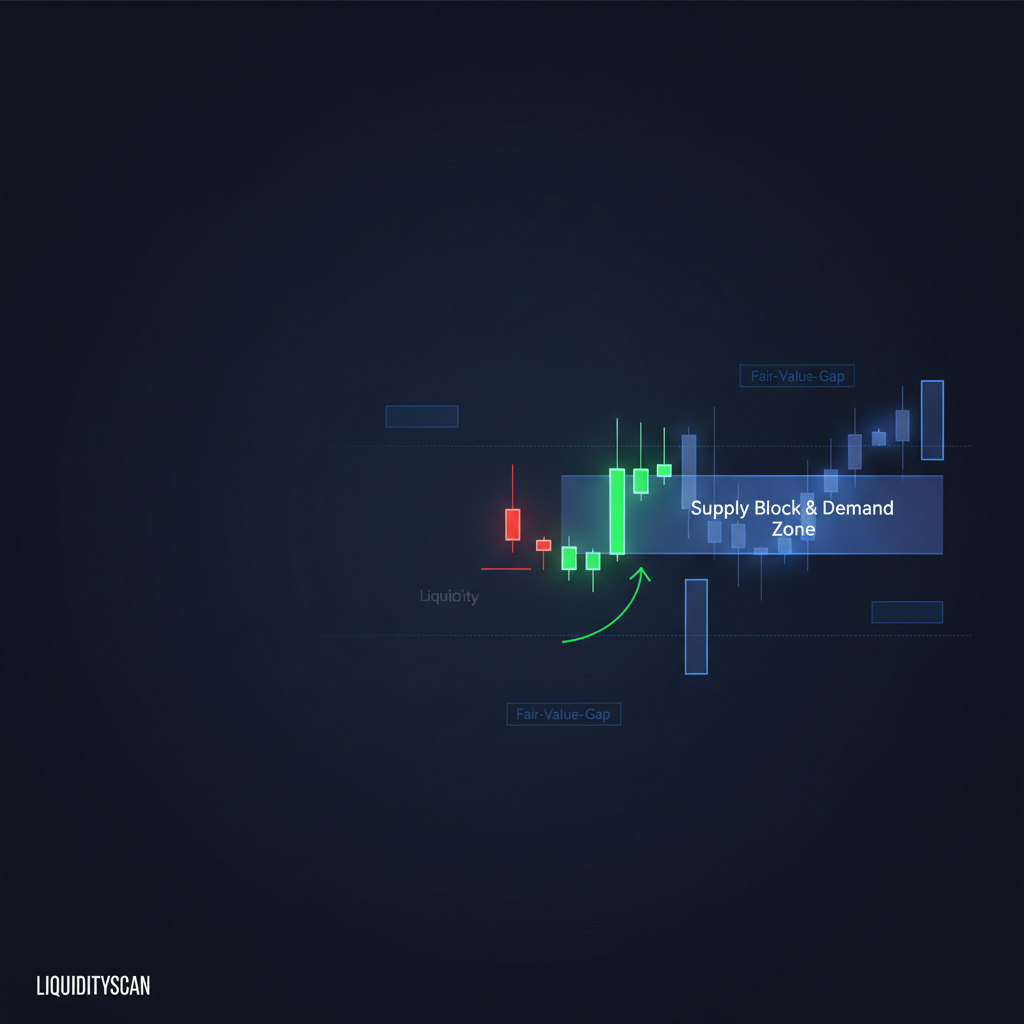
What Is the Real Difference Between an Order Block and a Supply and Demand Zone?
An order block is a single candle: the last opposite-direction candle before a displacement move that takes liquidity. A supply and demand zone is a basing area: the consolidation before an imbalanced departure. One construct is candle-precise; the other is area-based.
Both constructs try to mark the same footprint — a price region where large participants transacted and are likely to defend their position on a return. The disagreement is not about whether these regions exist. It is about how you locate the region, how wide you draw it, and what has to happen before it counts.
The order block, from the ICT and Smart Money Concepts tradition, answers the question: which exact candle did institutions leave behind before they moved price with intent? The supply and demand zone, from the Sam Seiden school of rally-base-drop analysis, answers a looser question: where did price rest before it left in a hurry?
This comparison stays strictly at the zone level — the candle construct versus the base construct. The broader methodology debate (top-down bias, kill zones, curve analysis, set-and-forget versus confirmation entries) is a separate discussion, and the order block vs supply and demand question is decided on the chart, not in the philosophy.
The Order Block: A Candle-Level Construct
A bullish order block is the last bearish candle before an impulsive move higher. A bearish order block is the last bullish candle before an impulsive move lower. The definition points at one specific candle, which is what makes the construct precise — and demanding.
The mechanical logic: when an institution accumulates a long position, it buys into resting sell orders. The final down candle before the markup is where the last block of sell-side liquidity was absorbed. When price later returns to that candle, unfilled institutional interest at those levels is expected to defend it.
But the last opposite candle alone is not enough. In the modern SMC framing, a valid order block requires three things around it:
- Liquidity taken. The move into the candle should sweep a prior low, equal lows, or another pool of sell-side liquidity (reversed for bearish blocks). Without a sweep, there was nothing for the institution to accumulate against.
- Displacement. The move away must be aggressive — large-bodied candles, ideally leaving a Fair Value Gap (FVG) behind. Displacement is the evidence of intent; a slow drift away proves nothing.
- Structural consequence. The displacement should break a swing point — a Break of Structure (BOS) or a change of character — confirming the candle actually changed the delivery of price.
Strip those conditions away and every last-down-candle on the chart becomes an "order block," which is exactly how the concept gets diluted. The candle is the anchor; the liquidity and displacement around it are the qualification.
The Supply and Demand Zone: A Base-Level Construct
The supply and demand school, popularized by Sam Seiden, does not look for a specific candle. It looks for a base: a tight consolidation of one to roughly six narrow-range candles where price paused before departing with force. The base is the zone.
Four structural patterns organize the whole method. Demand zones form as drop-base-rally (reversal) or rally-base-rally (continuation). Supply zones form as rally-base-drop (reversal) or drop-base-drop (continuation). In each case the base represents unfilled orders: institutions could not complete their position inside the consolidation, so the leftover orders remain when price returns.
The departure is the qualification. A valid zone leaves with extended-range candles — an obvious imbalance between buyers and sellers — because a violent exit implies the orders at the base were large relative to available liquidity. Seiden-style traders then grade zones on odds enhancers:
- Strength of the move away — the steeper and larger the departure, the bigger the implied imbalance.
- Time at the base — fewer candles is better; a long sideways base suggests orders were filled, not left behind.
- Freshness — the zone must be untested. Every retest consumes resting orders, so a second or third touch is materially weaker.
- Profit margin — enough room to the nearest opposing zone to justify the risk.
Notice what is absent: no liquidity-sweep requirement, no FVG requirement, no structural-break requirement. The zone is validated by how price left it, not by what the move consumed on the way in. That is the deepest zone-level difference between the two constructs.
How the Drawing Rules Differ
The definitions produce visibly different rectangles on the same chart. This is where the order block vs supply and demand distinction stops being academic and starts changing your entry price and stop distance.
Drawing an Order Block
You draw the order block from the boundaries of one candle. The common convention for a bullish block: from the candle's open down to its low — open-to-extreme — because the open marks where the down-move's body began and the wick low marks the sweep. Refinements go further: the mean threshold (the 50% level of the candle) is treated as the deepest acceptable entry, and some traders use only the candle body, discarding the wick entirely.
Concrete example. BTCUSDT, 4H: price declines from 67,800, prints equal lows near 64,700, then sweeps them with a final bearish candle — open 64,690, low 64,180. Three expansion candles follow, leaving an FVG and breaking structure at 65,900. The order block is 64,180–64,690, with a mean threshold near 64,435. One candle, ~510 points wide.
Drawing a Supply and Demand Zone
The demand trader draws around the whole base using two lines. The proximal line sits at the edge of the base nearest to current price — usually the highest body of the basing candles for demand. The distal line sits at the extreme of the base — the lowest wick. Everything between is the zone.
Same BTCUSDT chart: the base is the sweep candle plus the small inside candle before it. Distal line at 64,180 (the wick low), proximal line at 64,950 (the highest basing body). The demand zone is 64,180–64,950 — roughly 50% wider than the order block, with an entry trigger 260 points earlier.
Same footprint, two rectangles. The order block is a subset of the demand zone in this case, and that geometric relationship — candle inside base — is the norm whenever both constructs qualify.
Order Block vs Supply and Demand: Side-by-Side
The table condenses the zone-level differences. Treat each row as a rule you could code, because that is ultimately how you test which construct earns its place on your chart.
| Attribute | Order Block | Supply and Demand Zone |
|---|---|---|
| Core unit | Single candle (last opposite candle) | Basing area (1–6 consolidation candles) |
| School | ICT / Smart Money Concepts | Sam Seiden / classic S&D |
| Qualification | Liquidity taken + displacement + structure break | Strong imbalanced departure from a base |
| Zone boundaries | Candle open-to-extreme; body or 50% refinements | Proximal line (base edge) to distal line (base extreme) |
| Typical width | Narrow, candle-precise | Wider, base-dependent |
| Freshness rule | First return preferred; mitigation weakens it | Untested zones only; each retest degrades it |
| Entry style | Limit at open or mean threshold, often with LTF confirmation | Set-and-forget limit at the proximal line |
| Stop placement | Beyond the order block candle's extreme | Beyond the distal line |
| Objectivity | High — every condition is candle-indexed and measurable | Moderate — base boundaries involve discretion |
Validation and Entry Mechanics Compared
Drawing the rectangle is half the construct. What invalidates it, and how you enter against it, differ just as much.
Validating an Order Block
The order block's validity is front-loaded: it either formed with a sweep, displacement, and a structural break, or it was never a valid block. After formation, the operative rules are freshness of return (the first tap carries the unfilled interest) and violation: a candle body closing through the block's extreme invalidates it. Many SMC traders also demote a block once price trades through its mean threshold, even without a full close-through.
Validating a Supply and Demand Zone
The zone's validity is graded, not binary. A fresh zone with a two-candle base and an extended-range departure scores high; a five-candle base with a grinding exit scores low but still "counts." Invalidation is simple: price closing beyond the distal line consumes the zone. The grading approach is flexible but pushes real decisions onto the trader's judgment — which is where consistency usually breaks down.
Entry and Stops: Where the Width Difference Bites
Take a EURUSD short. A supply zone spans 1.0850 (proximal) to 1.0875 (distal). The set-and-forget entry is 1.0850, stop above the distal with a spread buffer at 1.0880 — 30 pips of risk. An SMC trader refines the same area to the bearish order block inside it: a single candle from 1.0852 to 1.0864. Entry at the mean threshold, 1.0858; stop above the candle high at 1.0868 — 10 pips of risk.
To the same target at 1.0790, the zone trade returns roughly 2R; the order block trade returns roughly 6R. That is the entire practical case for candle-level precision — and its cost: the tighter stop gets swept by ordinary noise more often, so the order block trader accepts a lower hit rate per touch in exchange for asymmetric payoffs. Neither is free money; they are different points on the same precision-versus-tolerance curve.
Same Zone, Two Labels: Overlap, Divergence, and Objectivity
On many charts the two constructs mark the same area. A drop-base-rally whose base is a single down candle with a violent departure is a bullish order block by both definitions — the base and the last opposite candle are the same candle. In those cases the label is cosmetic; the drawing and stop rules above are what differ.
The genuine divergences appear at the edges:
- Multi-candle bases with no clean opposite candle. A five-candle sideways base before a rally is a textbook demand zone, but there may be no meaningful "last bearish candle" — the order block construct has nothing precise to anchor to.
- No liquidity taken. A rally-base-rally continuation zone forms mid-trend without sweeping anything. It qualifies as demand; it fails the order block's sweep requirement outright.
- No base at all. A single candle that sweeps lows and reverses with displacement inside a trend qualifies as an order block, while a strict Seiden trader may reject it for lacking a recognizable basing structure.
On objectivity, the order block wins — not because the idea is better, but because every qualifying condition is candle-indexed: the sweep is a prior low taken or not, displacement is measurable against ATR, the FVG exists or it doesn't, and the block's boundaries are one candle's OHLC. That makes it scannable and backtestable at scale; LiquidityScan's OB+ scanner, for instance, grades blocks automatically on exactly those liquidity-taken and displacement criteria. Base boundaries, by contrast, resist clean automation because "where the base ends" is a judgment call.
So the honest resolution of order block vs supply and demand at the zone level: they are overlapping detectors of the same institutional footprint, with the order block trading breadth for precision and testability, and the supply and demand zone trading precision for tolerance and simplicity. Learn both drawing rules, and let the chart tell you which construct the structure actually supports.
Frequently Asked Questions
Is an order block just a demand zone with a different name?
No. They often mark the same area, but the constructs differ: an order block is one specific candle qualified by a liquidity sweep and displacement, while a demand zone is a multi-candle base qualified by the strength of its departure. Drawing boundaries, stop placement, and invalidation rules all differ in practice.
Can an order block form inside a supply and demand zone?
Yes, and it usually does when both constructs qualify. The order block is typically the final opposite candle inside the base, making it a narrow subset of the wider zone. Many traders use the zone to define the area of interest and the order block to refine entry and tighten the stop.
Do supply and demand zones require a liquidity sweep?
No. Classic Seiden-style zones are validated by the base and the imbalanced departure alone — continuation patterns like rally-base-rally sweep nothing. The sweep requirement is specific to the order block construct, which is why many valid demand zones fail SMC's order block criteria.
Which is easier to backtest, order blocks or supply and demand zones?
Order blocks. Every qualifying condition — the swept low, displacement size, the resulting Fair Value Gap, the candle's boundaries — is objectively measurable, so rules can be coded and scanned without discretion. Supply and demand bases involve judgment about where consolidation starts and ends, which makes systematic testing noisier.
Related query paths
If you are mapping this comparison into a working playbook, these are the logical next queries, ordered from definition to application.
- What Is an Order Block? — the full candle-level definition this comparison builds on.
- Displacement in ICT: Reading Institutional Intent — the qualifying move that separates a real order block from a random candle.
- The Core Order Block Validation Rule for SMC Traders — the single filter that removes most false blocks.
- 3 High-Probability Order Block Entry Models — turning the tighter OB rectangle into concrete entries.
- Best Timeframe for Order Block Trading (ICT Guide) — where candle-level precision pays best across timeframes.
- ICT vs Supply and Demand: What's the Difference? — the methodology-level comparison, beyond the zone constructs covered here.
- Fair Value Gap vs Imbalance vs Liquidity Void: Clearing the Confusion — how it connects to fair value gap vs imbalance.
- FVG vs order block: compare the two entry zones — After separating order blocks from zones, compare them with fair value gaps.