
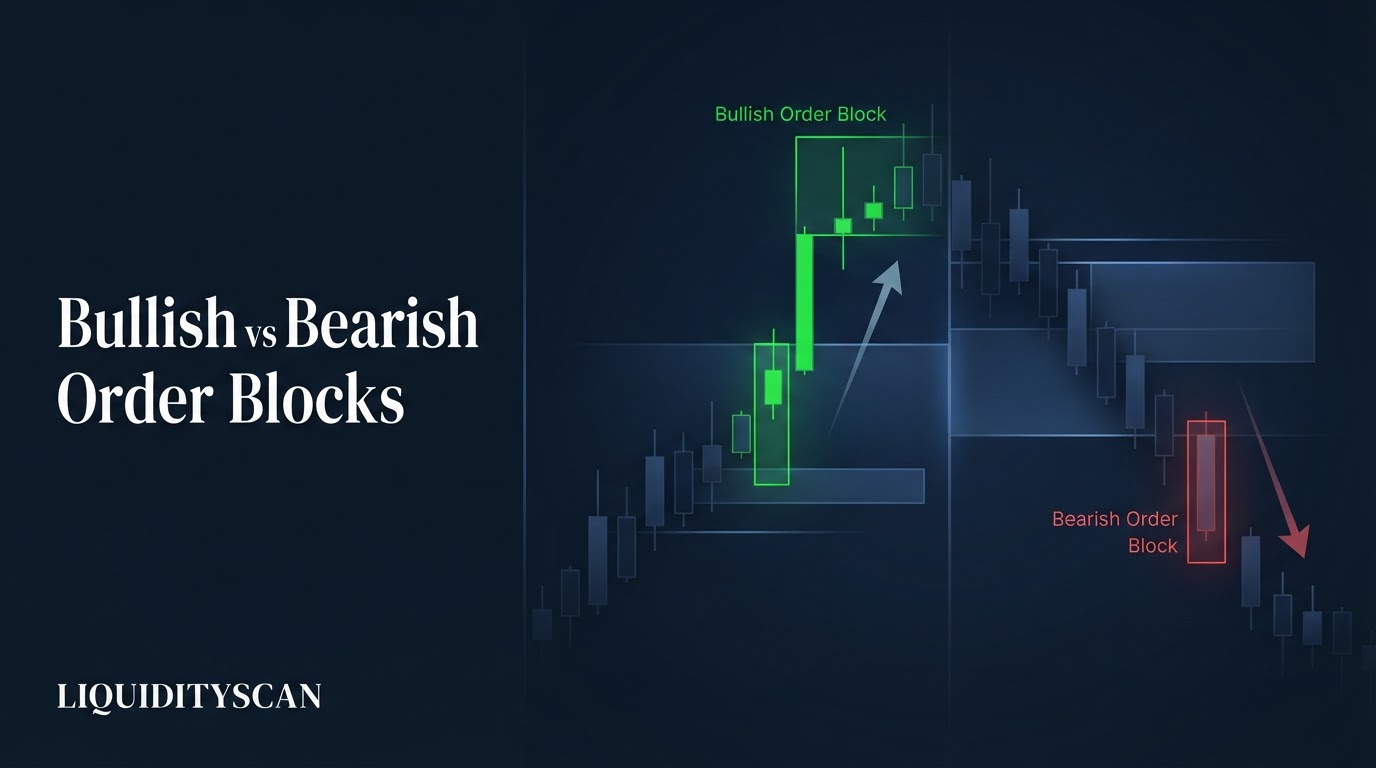
What Is the Difference Between a Bullish and Bearish Order Block?
A bullish order block is the last bearish (down-close) candle before a displacement move up; a bearish order block is the last bullish (up-close) candle before a displacement move down. The first marks demand for long entries, the second marks supply for short entries.
The two are exact mirrors. In both cases, the logic is identical: before institutions drive price aggressively in one direction, they fill the final tranche of their position into the opposing candle. That candle absorbs the last counter-directional flow — often sweeping resting stops in the process — and the aggressive leg that follows leaves it behind as a footprint of unfilled institutional interest.
An Order Block only earns the name when the move away from it is genuine displacement: a fast, one-sided expansion that typically leaves a Fair Value Gap (FVG) and breaks a structural level. A red candle followed by a lazy drift higher is not a bullish order block; it is just a red candle. This distinction — displacement or nothing — is the single filter that separates tradable zones from chart clutter.
| Attribute | Bullish Order Block | Bearish Order Block |
|---|---|---|
| Candle type | Last bearish candle before the up-leg | Last bullish candle before the down-leg |
| Displacement direction | Up, ideally leaving an FVG above | Down, ideally leaving an FVG below |
| Liquidity taken | Sell-side liquidity below its low | Buy-side liquidity above its high |
| Structural consequence | Bullish BOS or CHoCH | Bearish BOS or CHoCH |
| Zone boundaries | Candle open down to its low (or body) | Candle open up to its high |
| Best location | Discount (below range equilibrium) | Premium (above range equilibrium) |
| Used for | Long entries on the retrace | Short entries on the retrace |
| Invalidated by | Candle body closing below its low | Candle body closing above its high |
How to Identify a Bullish Order Block, Step by Step
Work backwards from the move, not forwards from the candle. Traders who scan for red candles first find hundreds of candidates; traders who scan for displacement first find the three that matter.
Step 1: Find the displacement leg up
Locate an impulsive rally — large-bodied green candles, small wicks, ideally an FVG left inside the leg. A useful objective bar: the leg's range should be at least 1.5× the average candle range of the preceding 10–20 candles. Slow grinds do not qualify.
Step 2: Find the last bearish candle before it
Walk left from the first displacement candle to the most recent down-close candle. That single candle is the candidate bullish order block. If several small red candles cluster together, the block is the final one, though some traders group a tight cluster into one zone.
Step 3: Verify liquidity was taken below it
Check whether the candidate's low (or the leg's low) ran sell-side liquidity — a prior swing low, equal lows, or a session low. This is what upgrades the candle: the down-move into it wasn't random, it was engineered to fill buy orders against trapped sellers.
Step 4: Verify the structural consequence
The displacement must actually change the map: a Break of Structure (BOS) above a prior swing high in an uptrend, or a Change of Character (CHoCH) if it flips a downtrend. No structural break, no confirmed block — you only have a bounce.
How to Identify a Bearish Order Block, Step by Step
Mirror every rule. The mechanics are identical with the polarity reversed, which is why traders who can only see one side of the market usually have a directional bias problem, not a knowledge problem.
Step 1: Find the displacement leg down
Locate an impulsive decline — heavy-bodied red candles breaking cleanly through prior lows, ideally leaving a bearish FVG. Apply the same 1.5× expansion test.
Step 2: Find the last bullish candle before it
Walk left to the most recent up-close candle preceding the drop. That green candle — often the one that pushed into a high right before the reversal — is the candidate bearish order block.
Step 3: Verify liquidity was taken above it
The candle's high should have run buy-side liquidity: a prior swing high, equal highs, or a session high. Breakout buyers entered there and their stops now sit below; the institutions sold into that buying. A bearish block whose high swept nothing is materially weaker.
Step 4: Verify the structural consequence
The down-leg must print a bearish BOS (below a prior swing low in a downtrend) or a bearish CHoCH (flipping an uptrend). The CHoCH variant is the classic reversal short: sweep above the highs, last green candle, displacement down through structure.
How to Mark Bullish and Bearish Order Blocks on Your Chart
Marking convention matters because your entry, stop, and invalidation all key off the box you draw. The two sides use mirrored boundaries.
- Bullish order block: draw the zone from the candle's open down to its low. This captures the body plus the lower wick — the wick is where the final sell-side sweep happened and is frequently the exact reversal point. A tighter alternative is body-only (open to close), which improves entry price at the cost of more missed fills.
- Bearish order block: draw from the candle's open up to its high, capturing the body plus the upper wick where buy-side was swept.
- Mean threshold: mark the 50% midpoint of each zone with a horizontal line. In ICT terms this is the mean threshold — the deepest level a healthy retrace should respect. Many traders set limit orders here rather than at the zone's edge, roughly halving stop distance.
Extend the box right in time until price either mitigates it or invalidates it. Delete invalidated boxes immediately; a chart carrying twenty dead rectangles produces hesitation at the three live ones.
Stacked and nested blocks: order blocks exist on every timeframe simultaneously, and the strongest zones nest. A 15-minute bullish block sitting inside a 4-hour bullish block inherits the higher-timeframe zone's significance while giving you a far tighter stop. Mark the HTF block first, then drop down and look for the refined LTF block — or an FVG — inside it. When two same-direction blocks stack vertically after consecutive legs, the one that has never been touched (unmitigated) takes priority over one already tapped.
Context Filters: When Each Block Is Worth Trading
Identification tells you a block exists; context tells you whether to trade it. Two filters remove most losers.
HTF trend alignment. Trade bullish blocks when the higher timeframe is making higher highs and higher lows, bearish blocks in the mirror case. A bearish order block inside a strong 4-hour uptrend is usually just fuel — price runs straight through it because the dominant flow is absorbing all supply. Counter-trend blocks only deserve attention after a confirmed HTF CHoCH.
Premium/discount location. Anchor the current dealing range (last significant swing low to swing high) and mark its 50% equilibrium. Bullish order blocks are high quality in discount — the lower half — because you are buying where price is cheap relative to the range. A bullish block sitting in deep premium, say the upper 25% of the range, is low quality: even if it holds, the remaining upside to the range high is small and the block competes with overhead supply. Bearish blocks invert this — they belong in premium.
Invalidation — the body-close rule. A block dies when a candle body closes through its far side: below the low for a bullish block, above the high for a bearish block, on the timeframe that defined it. Wicks through the level are acceptable — they are often a final sweep of the stops resting behind the zone — but a full body close means the institutional interest that created the block is gone. A violated block frequently inverts into a Breaker Block, so the level stays useful; the original trade idea does not. LiquidityScan's OB+ scanner applies these same displacement, liquidity, and freshness checks automatically across timeframes, which is a practical way to audit whether your manual markings match rule-based ones.
Worked Examples: One Bullish, One Bearish Order Block Trade
BTCUSDT 4H — bullish order block long. Price trends down into equal lows at 61,450. A final flush sweeps them, printing a low of 61,200. The candle that makes that low is bearish: open 61,900, low 61,200, close 61,550. The next three candles displace upward, leaving a 4-hour FVG and closing through the prior swing high at 62,800 — a CHoCH. All four criteria check: displacement up, last bearish candle, sell-side taken at 61,450, structure broken.
Mark the block from 61,900 (open) to 61,200 (low); mean threshold at 61,550. The new dealing range is 61,200–64,400, so equilibrium sits at 62,800 — the entire block lies in discount. Two days later price retraces to 61,530 — through the zone edge and just past the mean threshold — then reverses. A limit at the mean threshold (61,550) fills; with a stop below the block at 61,050 it risks 500 points against roughly 2,850 to the range high at 64,400 — about 5.7R if the external liquidity target is reached. Had the retrace stopped at the zone edge instead, only an edge-resting order would have filled — the trade-off you accepted when choosing where to rest the limit.
EURUSD 1H — bearish order block short. London rallies into equal highs at 1.0885 and sweeps them with a spike to 1.0892. The candle printing that high is bullish: open 1.0868, high 1.0892, close 1.0884. The following two hours displace down through the 1.0850 intraday low to 1.0838 — a bearish CHoCH with an FVG left behind. Mirror criteria check: displacement down, last bullish candle, buy-side taken at 1.0885, structure broken.
Mark the block from 1.0868 (open) to 1.0892 (high); mean threshold at 1.0880. During the New York session price retraces to 1.0876 — into the zone, just shy of the mean threshold — and stalls. A short from 1.0876 with a stop at 1.0897 (above the block high plus spread) risks 21 pips against sell-side resting at 1.0800, roughly 76 pips of target: about 3.6R. Invalidation is unambiguous: any 1-hour body close above 1.0892 and the idea is dead.
Common Mistakes When Marking Each Side
Most errors are side-specific because each direction tempts a different shortcut.
- Bullish blocks — marking every red candle in an uptrend. In a rally, dozens of down candles precede up-moves. Without the displacement and liquidity tests, you are drawing pullbacks, not order blocks.
- Bullish blocks — ignoring the wick. Marking body-only and treating a tap of the lower wick as a miss, or worse, putting the stop at the candle close instead of below the low. The wick low is part of the zone and the sweep point.
- Bearish blocks — chasing them in a bull trend. The most expensive habit: shorting every bearish block on a lower timeframe while the daily makes higher highs. HTF alignment first, entries second.
- Bearish blocks — using the close instead of the open. The zone runs open-to-high. Anchoring from the close shifts the box upward, so retraces that reverse from inside the real body never tag your zone, and the mean threshold you compute from the shrunken box sits too high.
- Both sides — treating a wick-through as invalidation. Exiting on a wick beyond the far edge surrenders the position exactly where the final stop-sweep completes. Only a body close through invalidates.
- Both sides — re-trading mitigated zones. First touch carries the highest quality; the third and fourth taps of the same block usually precede its failure because the resting interest has been consumed.
The comparison ultimately collapses to one sentence: bullish vs bearish order block is a single concept viewed from two directions — the last opposing candle before displacement, marked open-to-extreme, traded on its first discounted or premium retrace, and abandoned the moment a body closes through it. Master one side rigorously and the mirror comes free.
Frequently Asked Questions
Can a single candle be both a bullish and a bearish order block?
Not simultaneously, but sequentially yes. A bullish order block that fails — body close below its low — often becomes the origin of a down-leg, and its territory can act as a breaker or supply on the return. The label always follows the most recent displacement away from the candle, not the candle's color alone.
What timeframe should beginners use to mark order blocks?
Start on the 4-hour and daily. Higher-timeframe blocks form from larger institutional flows, get respected more cleanly, and give you hours to plan instead of seconds. Once your marking is consistent there, refine entries by dropping to the 15-minute chart inside an already-validated HTF zone.
Is an order block still valid if price never retraces to it?
Yes — validity and mitigation are separate properties. An untouched (unmitigated) block remains a live zone of interest until a body closes through it, however long that takes. Strong trends often leave several unmitigated blocks behind; these become the natural targets and re-entry zones of the eventual retracement.
Should the stop loss go at the order block edge or beyond it?
Beyond it, with buffer. For a bullish block, place the stop below the candle low plus an allowance for spread and a possible wick sweep; for a bearish block, above the high. Stops parked exactly at the edge sit inside the pool of liquidity the market is incentivized to run before reversing.
Related query paths
Build out the full order block workflow with these deeper guides, in reading order.
- What Is an Order Block? — the foundational definition and institutional logic behind the zone itself.
- Displacement in ICT: Reading Institutional Intent — how to judge whether the leg away from a candle truly qualifies.
- How to Draw Premium & Discount Zones (ICT Guide) — anchoring the dealing range that decides which block is worth trading.
- The Core Order Block Validation Rule for SMC Traders — the single validation test that filters out decorative rectangles.
- 3 High-Probability Order Block Entry Models — turning a marked bullish or bearish zone into a concrete entry plan.
- Best Timeframe for Order Block Trading (ICT Guide) — matching block timeframe to your session and holding period.
- How to Identify an Order Block on a Chart — how it connects to how to identify an order block.